最初にmapboxのサイトでアカウントを作成しログイン
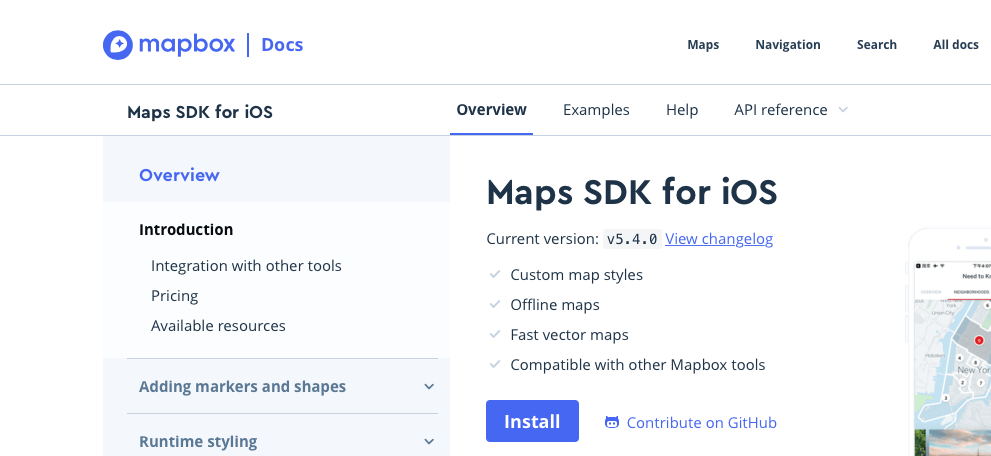
MapBox SDKのページを開く
https://docs.mapbox.com/ios/maps/overview/
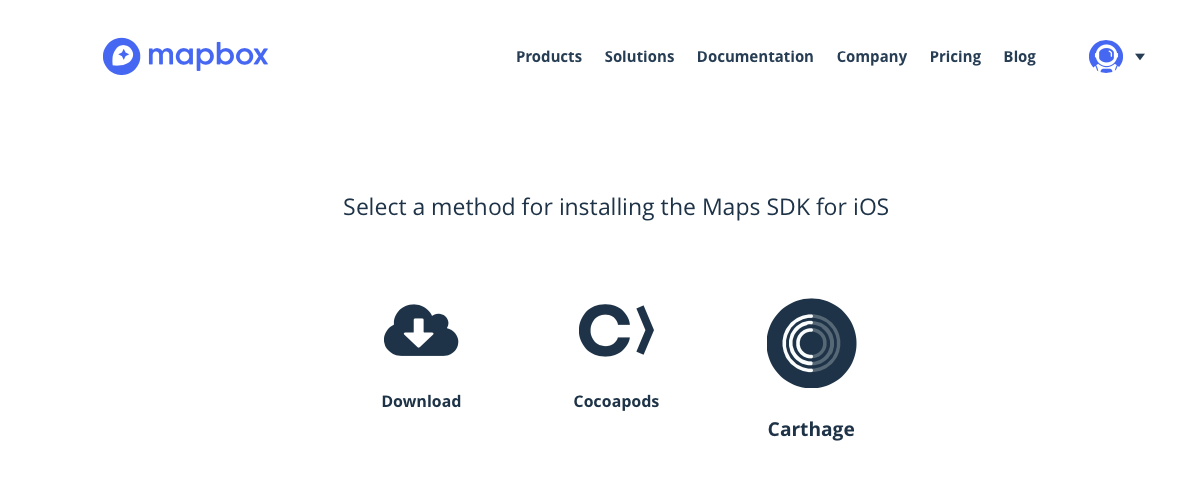
インストールボタンをクリック
ダウンロードボタンをクリック
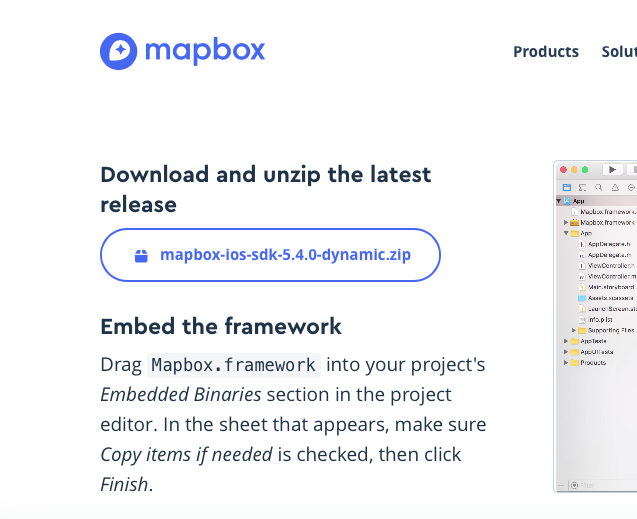
mapbox-ios-sdk-5.4.0-dynamic.zipをダウンロード
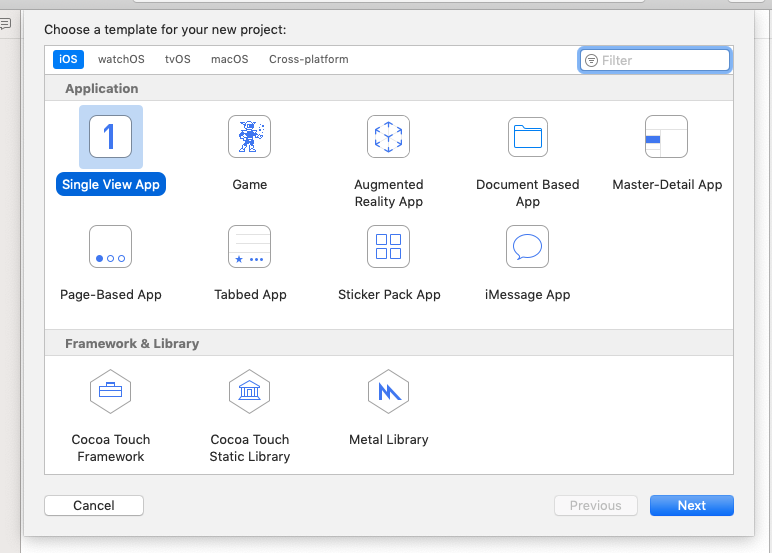
XCODEを起動してSingle View Appのプロジェクトを作成
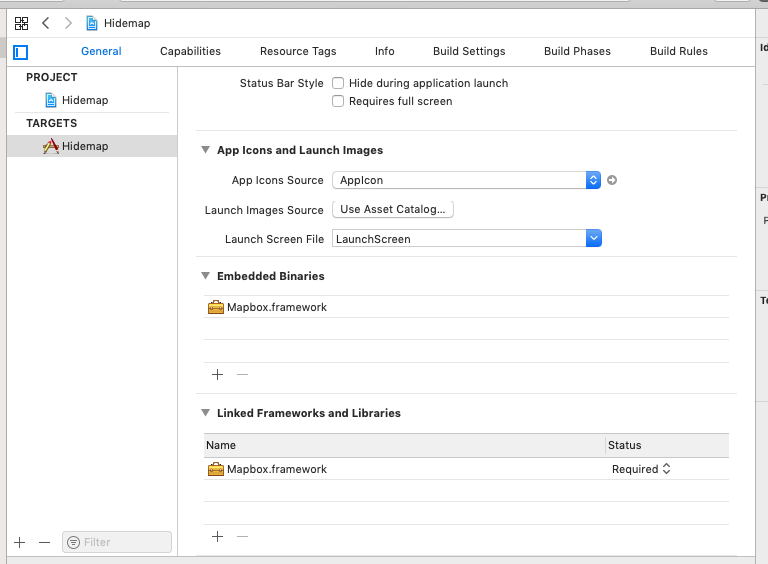
ダウンロードしたmapbox-ios-sdk-5.4.0-dynamic.zipを展開し中のMapbox.frameworkをEmbedded Binariesにドラッグして参照を追加
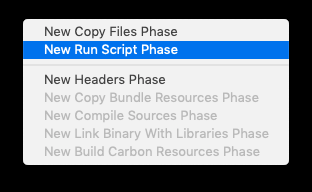
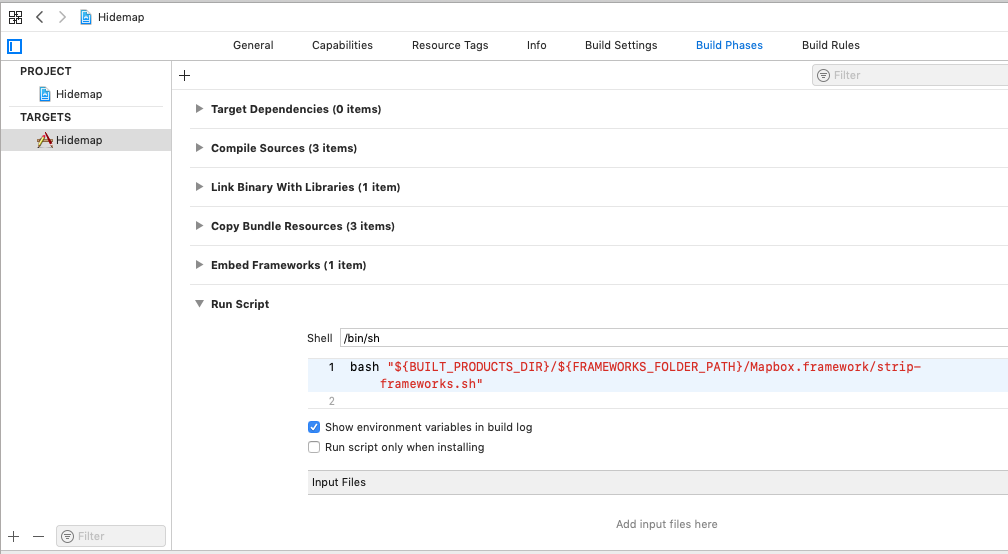
TARGETSのBuild Phases画面を開き、+(追加)ボタンを押す

Run Scriptを追加しMapboxのサイトに従い設定
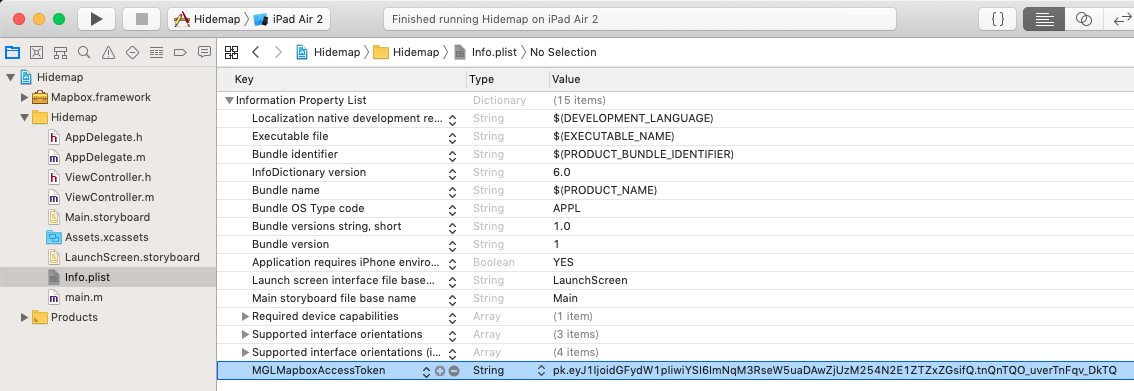
info.listにMGLMapboxAccessTokenを追加しキーを入力
ViewController.mを編集
#import "ViewController.h"
@import Mapbox;


@interface ViewController () <MGLMapViewDelegate>
@property (nonatomic) MGLMapView *mapView;
@end
地図を表示
ViewControllerのviewDidLoadを以下に従って編集
- (void)viewDidLoad {
    [super viewDidLoad];
    NSURL *url = [NSURL URLWithString:@"mapbox://styles/mapbox/streets-v11"];
    self.mapView = [[MGLMapView alloc] initWithFrame:self.view.bounds styleURL:url];
    self.mapView.autoresizingMask = UIViewAutoresizingFlexibleWidth | UIViewAutoresizingFlexibleHeight;
    [self.mapView setCenterCoordinate:CLLocationCoordinate2DMake(35.73353,139.712118)
                       zoomLevel:12
                        animated:NO];
    self.mapView.delegate = self;
    [self.view addSubview:self.mapView];

    [[NSNotificationCenter defaultCenter] addObserver:self selector:@selector(offlinePackProgressDidChange:) name:MGLOfflinePackProgressChangedNotification object:nil];
    [[NSNotificationCenter defaultCenter] addObserver:self selector:@selector(offlinePackDidReceiveError:) name:MGLOfflinePackErrorNotification object:nil];
    [[NSNotificationCenter defaultCenter] addObserver:self selector:@selector(offlinePackDidReceiveMaximumAllowedMapboxTiles:) name:MGLOfflinePackMaximumMapboxTilesReachedNotification object:nil];
}
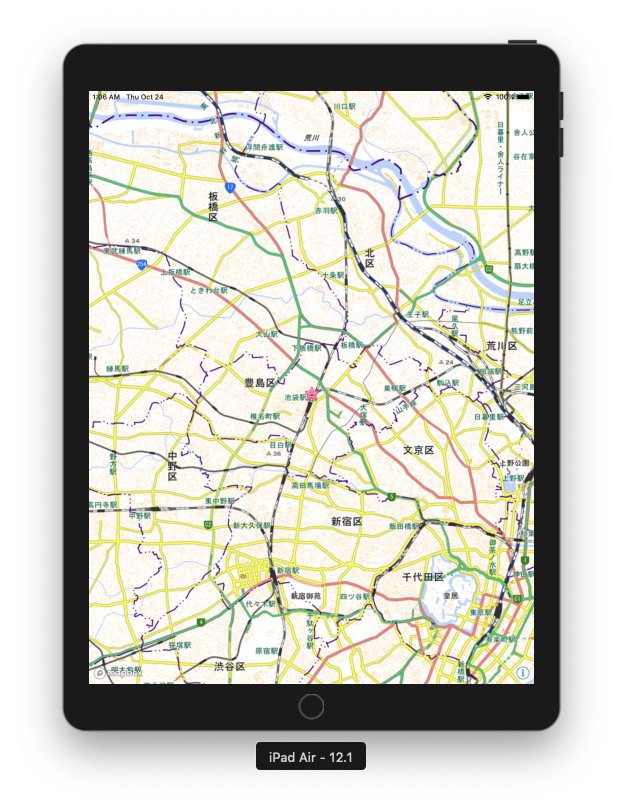
池袋を中心に地図を表示
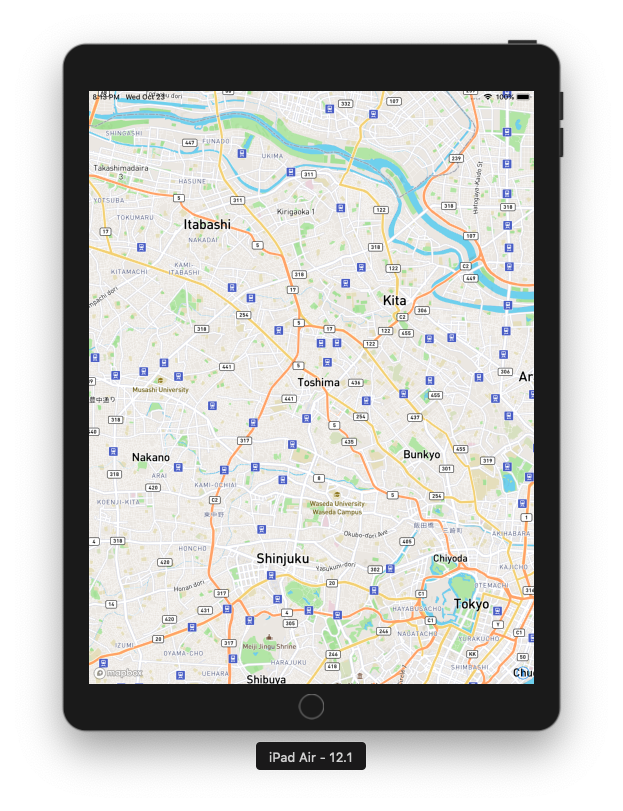
デフォルトのAnnotationを表示
- (void)mapViewDidFinishLoadingMap:(MGLMapView *)mapView {
    MGLPointAnnotation *hello = [[MGLPointAnnotation alloc] init];
    hello.coordinate = CLLocationCoordinate2DMake(35.73353,139.712118);
    hello.title = @"カーネル";
    hello.subtitle = @"Welcome to my marker";
    [mapView addAnnotation:hello];
}

- (MGLAnnotationImage *)mapView:(MGLMapView *)mapView viewForAnnotation:(id <MGLAnnotation>)annotation {
    return nil;
}

- (BOOL)mapView:(MGLMapView *)mapView annotationCanShowCallout:(id <MGLAnnotation>)annotation {
    return NO;
}

関数:annotationCanShowCalloutの戻り値にYESを返すとAnnotationをクリックするとTooltipを表示する
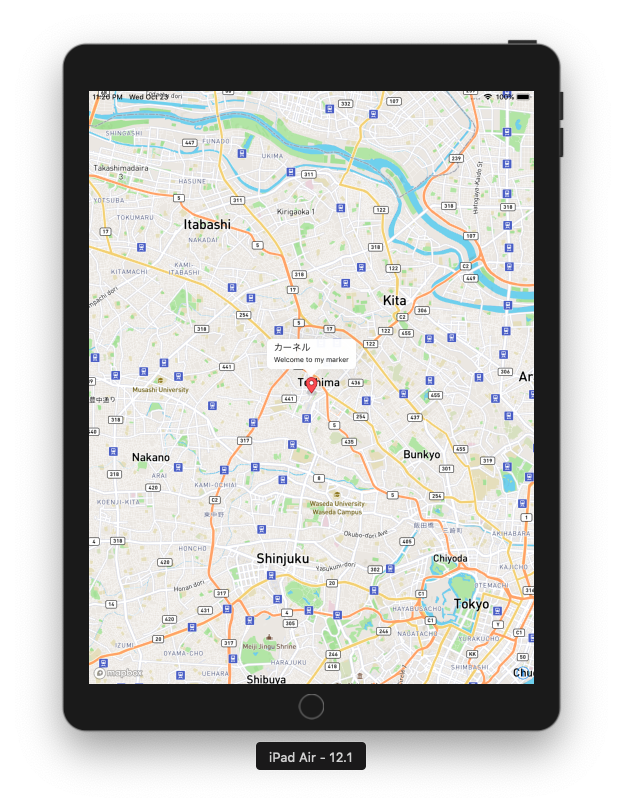
デフォルトのAnnotationではなくMGLAnnotationViewを使ってカスタムAnnotationを表示
viewForAnnotationでnilではなく、MGLAnnotationViewを返す
- (MGLAnnotationImage *)mapView:(MGLMapView *)mapView viewForAnnotation:(id <MGLAnnotation>)annotation {
    // 100はannotationを区別するキー。テストなので固定
    MGLAnnotationView *annotationView = [mapView dequeueReusableAnnotationViewWithIdentifier:@"100"];
    if (!annotationView) {
        annotationView = [[MGLAnnotationView alloc] initWithReuseIdentifier:@"100"];
        annotationView.frame = CGRectMake(0, 0, 30, 30);
        annotationView.layer.cornerRadius = annotationView.frame.size.width / 2;
        annotationView.layer.borderColor = [UIColor whiteColor].CGColor;
        annotationView.layer.borderWidth = 4.0;
        annotationView.backgroundColor = [UIColor colorWithRed:0.03 green:0.80 blue:0.69 alpha:1.0];
    }

    return annotationView;
}
MGLAnnotationViewを選択するとdidSelectAnnotationViewイベントが発生する
- (void)mapView:(MGLMapView *)mapView didSelectAnnotationView:(MGLAnnotationView *)annotationView {
    NSLog(@"didSelectAnnotationView");
}
Annotationに画像を表示
viewForAnnotationではnilを返すように戻し、imageForAnnotationでMGLAnnotationImageを返すように変更
- (MGLAnnotationImage *)mapView:(MGLMapView *)mapView viewForAnnotation:(id <MGLAnnotation>)annotation {
    return nil;
}

- (MGLAnnotationImage *)mapView:(MGLMapView *)mapView imageForAnnotation:(id <MGLAnnotation>)annotation {

    MGLAnnotationImage *annotationImage = [mapView dequeueReusableAnnotationImageWithIdentifier:@"100"];
    if (!annotationImage) {
        UIImage *image = [UIImage imageNamed:@"place8.png"];
        image = [image imageWithAlignmentRectInsets:UIEdgeInsetsMake(0, 0, image.size.height/2, 0)];
        annotationImage = [MGLAnnotationImage annotationImageWithImage:image reuseIdentifier:@"100"];
    }

    return annotationImage;
}

背景を国土地理院のタイル(ラスタ)に変更
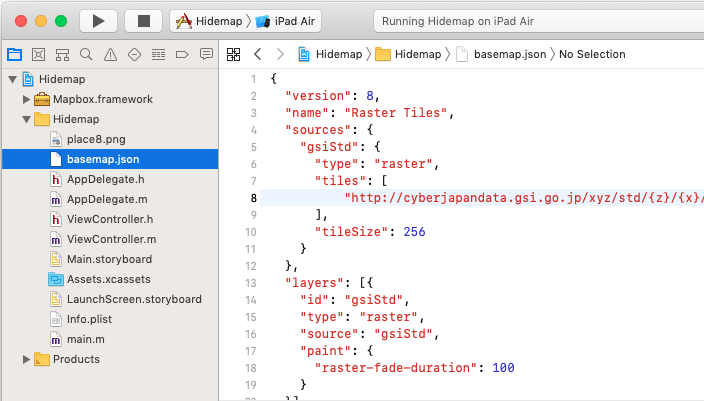
baseman.jsonを作成(ファイル名は任意)
このファイルの内容はmapbox-gl-native for ios で地理院地図を表示してみるのそのまんまです
{
  "version": 8,
  "name": "Raster Tiles",
  "sources": {
    "gsiStd": {
      "type": "raster",
      "tiles": [
          "http://cyberjapandata.gsi.go.jp/xyz/std/{z}/{x}/{y}.png"
      ],
      "tileSize": 256
    }
  },
  "layers": [{
    "id": "gsiStd",
    "type": "raster",
    "source": "gsiStd",
    "paint": {
      "raster-fade-duration": 100
    }
  }]
}
baseman.jsonをプロジェクトに追加
MGLMapViewのコンストラクタに渡すstyleURLを変更
- (void)viewDidLoad {
    [super viewDidLoad];
    NSURL *url = [[NSBundle mainBundle] URLForResource:@"basemap" withExtension:@"json"];
    self.mapView = [[MGLMapView alloc] initWithFrame:self.view.bounds styleURL:url];
    self.mapView.autoresizingMask = UIViewAutoresizingFlexibleWidth | UIViewAutoresizingFlexibleHeight;
    [self.mapView setCenterCoordinate:CLLocationCoordinate2DMake(35.73353,139.712118)
                       zoomLevel:12
                        animated:NO];
    self.mapView.delegate = self;
    [self.view addSubview:self.mapView];

    以下省略
}